To access a proxy server’s advanced settings, click the button in Proxifier’s Proxy Server dialog.
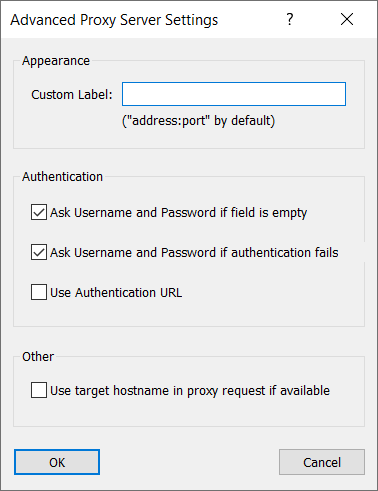
You can define a custom label (short name) for the proxy server. Proxifier will use this name instead of the proxy address in all parts of the program (rules, logs, etc.). This option is convenient when multiple proxy servers have the same or similar addresses.
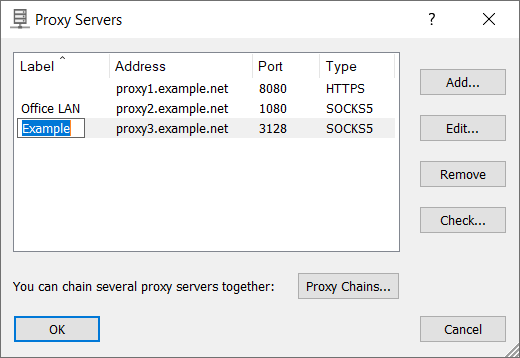
If at least one proxy server has a label, Proxifier will display a new Label column in the proxy list. You can edit the labels right there.
Proxifier can interactively ask the user for a proxy server login and password if one of these or .
When a condition specified in one of these options is met, Proxifier displays the following form.
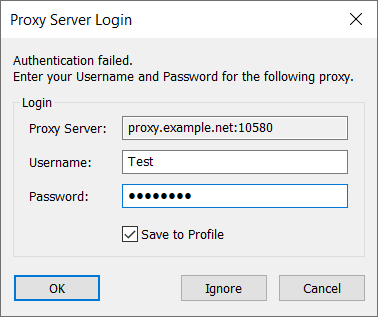
It is possible to specify and/or correct login details, , or permanently (within the current Proxifier session) this message so that it will not be displayed again; the authentication will fail silently each time.
If the option is not enabled, the new login details will be used only during the current Proxifier session. No changes will be saved on disk to the profile in this case.
When this pop-up form is active, all connections are put on hold. Proxifier will continue processing when the authentication succeeds. The entire process is completely transparent for client applications.
By default, Proxifier uses the target’s IP address in the connection request sent to the proxy server. If you wish to use the hostname instead, check the option.
This option may be useful when a proxy server has hostname-based access rules that may block connections by IP.
Please note that, if the original connection was made by an IP address (hostname is unknown), Proxifier will use the IP address regardless of the option.
Enabling this mode allows users to specify an authentication URL instead of a username/password in the main proxy settings. Proxifier will use this URL to be authorized on the proxy server.
This option works only with specific proxy servers, such as Blue Coat. Additional configuration is required on the server side.